Share this article
Best Way to Use Vue.js with Python Development
JavaScript has kept the world running. According to a survey, it is seen that it is the most commonly used programming language in the year 2021. This is mainly due to its sophisticated syntax and detailed structure. It is also because of the wide array of strong tools and libraries that different applications are very simple to use.
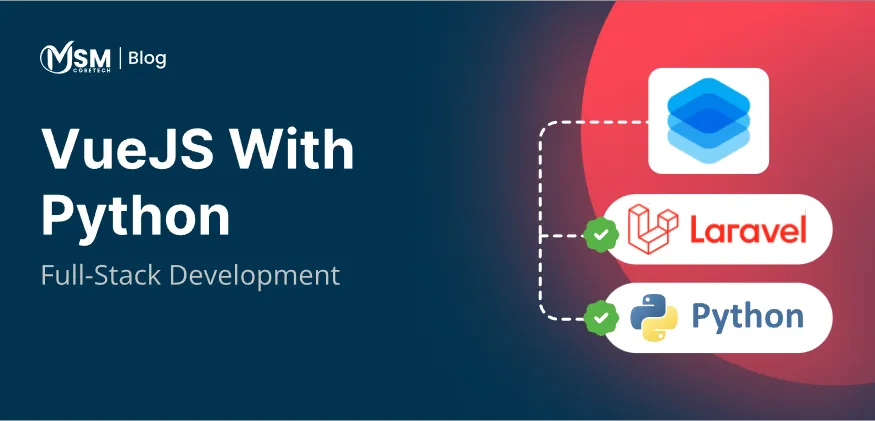
Vue.js has been expanding its appeal as one of the greatest innovative and strong JavaScript frameworks presently available. In this blog, we are going to talk regarding Vue.js with Python Development, one of the foremost and widely used programming languages in today’s development framework.
VueJS Development Using Python
One of the easiest ways to learn about VueJS with Python development is by practicing it. By doing that, you can see both Python and Vue.js in operation, so you will have a more realistic comprehension of the advantages of each language.
To explain website development in jaipur combining VueJS and Python, this blog contains detailed information on how to build a single page application using Python and VueJS. Vue.js handles the frontend, whereas Python takes care of the backend, which means they are each accountable for signing in, signing out, and signing up. A Microsoft SQL server will be used to store the data. Today many businesses depend on full-stack development services to bring both technologies together accurately.
First Step: Installation
To initiate, ensure that your Python is installed. If it is not there yet, download it from the official website.
If you are someone installing Python for the very first time, ensure that you enable the box to add Python to environmental variables. This will enable you to use Terminal to run Python from any directory.
You will also require a text editor to make changes or to edit your code. Notepad++ is a highly recommended application, as it is simple to use and is available for all platforms for free.
You will have to make sure you have an SQL server set up. You can use Microsoft SQL Server Express, which is also free.
After it’s installed, you will also need something to keep your server maintained. Microsoft SQL Server Management Studio is widely suggested.
Second Step: Set Up The Framework
The next step is to configure your SPA’s infrastructure in your programming directory. Generate a directory called Python SPA particularly for this purpose.
Next, make a subdirectory inside that directory and call it “backend.”
Open the Notepad++ application on your desktop and create a fresh file. This section is where you are going to compose your code.
Lastly, this instance needs some libraries. In Terminal, run the given script:
pip install blinker
pip install cryptography
pip install Flask
pip install Flask-Login
pip install Flask-SQLAlchemy
pip install PyJWT
pip install pyodbc
pip install SQLAlchemy
pip install Werkzeug
These programs enable it so that you can communicate with your database (DB). To maintain this data, initially, set up a separate folder in the backend subsidiary directory. Name this new folder “entities.”
Third Step: Create Initial Python Files
Within the contents of the entities folder, produce a new file with Notepad++. Call it “users.py,” which will be a Python file, and enter the data that follows:
# entities\user.py
# Author : Andre Baldo (http://github.com/andrebaldo/)
# Defines the User data model
from flask_sqlalchemy import SQLAlchemy
import flask_login
db = SQLAlchemy()
class User(db.Model, flask_login.mixins.UserMixin):
__tablename__ = ‘User’ # Name of the table in our database
# Defining the columns
userId = db.Column(db.Integer, primary_key=True)
username = db.Column(db.String(80), unique=True, nullable=False)
password = db.Column(db.String(120), unique=False, nullable=False)
mobilePhone = db.Column(db.String(80), unique=False, nullable=True)
def get_id(self):
return chr(self.userId)
Then build another file called “userSession.py:”
# entities\userSession.py
# Author : Andre Baldo (http://github.com/andrebaldo/)
# Defines the UserSession (login session) data model
from flask_sqlalchemy import SQLAlchemy
from sqlalchemy import Column, ForeignKey, Integer, String, DateTime, Boolean
class UserSession(SQLAlchemy().Model):
__tablename__ = ‘UserSession’ # Name of the table in our database
# Defining the columns
userSessionId = Column(Integer, primary_key=True)
userId = Column(Integer, nullable=False)
loginDate = Column(DateTime, nullable=False)
expireDate = Column(DateTime, nullable=False)
loggedOut = Column(Boolean, nullable=False)
jwToken = Column(String(4000), nullable=False)
url = Column(String(4000), nullable=False)
logoutDate = Column(DateTime, nullable=False)
At last, develop databaseSessionManager.py:
# entities\databaseSessionManager.py
# Author : Andre Baldo (http://github.com/andrebaldo/)
# This class will return a database SQLAlchemy session,
# classes which want to manipulate data can use it to manipulate the database.
from sqlalchemy import create_engine
from sqlalchemy.orm import sessionmaker
SERVER = ‘localhost’
DATABASE = ‘project001’
DRIVER = ‘SQL Server Native Client 11.0’
DATABASE_CONNECTION = f’mssql://{SERVER}/{DATABASE}?trusted_connection=yes&driver={DRIVER}’
engine = create_engine(DATABASE_CONNECTION, echo=True)
# create a Session
Session = sessionmaker(bind=engine)
class SessionManager(object):
def __init__(self):
self.session = Session()
After you write the code, save every file.
The same will be done for services, and then the app needs to be created itself. As Python and SQL are both powerful and complex programming languages, going into detail is a bit outside the box. Refer to the GitHub repository to copy the content of the files and codes. This will save you some time.
Or you can just replicate the directory in your development folder by writing:
git clone https://github.com/andrebaldo/python-vue-spa-boilerplate
After this, go to Vue.js to find how Python works with Vue.js.
Fourth Step: Start To Use Vue.js
To use Vue.js, the first step you need to do is to ensure Node.js is present in your system. Then go to Vuejs.org and simply install it.
Since everything is installed now, go to the root directory and execute the following command.
vue create frontend
This step will open a set up wizard. Pick the “Manually Select Features” option to choose.
Since you have all the options now, select these:
- Babel
- Progressive Web App (PWA) Support
- Router
- Vuex
- Linter/Formatter
After that, you will be guided through the Vuex process, which will let you arrange the needed data for the frontend in a single location. Choose one:
ESLint With Error Prevention Only
Lint on save
In dedicated config files
This is going to generate a directory, which is called “frontend.” Go to that folder and run the command that follows.
yarn serve
A local server will be opened after this. To see if it is running or not, go to:
localhost:8080/
Now, it’s time to configure Vue.js to make even more use of it. Download Vuetify, which works as a plugin and lets you generate visually attractive interfaces. Just enter:
vue add vuetify
At the end, one final requirement needs to be installed, which is axios.
npm install axios –save
Fifth Step: Include a Navigation Bar
At this stage, you are ready to alter your SPA as you see fit. To demonstrate Vue in action, we will add a navigation bar. Within the components (elements) folder, enter the following:
frontend\src\components\Navbar.vue
Author: Author: Andre Baldo (http://github.com/andrebaldo/) –>
End this by examining the Vue file, which will help you comprehend more fully what is happening. The initial section is the template, which sets up the Vue file identically to a YAML file.
What is coming next in Vue.js is determined in the script section. And more enhancement and customization in your application is allowed by the Style section.
In the end, you simply need to insert a navigation bar within the app.vue file. Search for the App.vue file beneath the /frontend/src directory. Change the code with the following instructions:
frontend\src\App.vue
Author: Author : Andre Baldo (http://github.com/andrebaldo/) –>
End this by examining the Vue file, which will help you comprehend more fully what is happening. The initial section is the template, which sets up the Vue file identically to a YAML file. What is coming next in Vue.js is determined in the script section. And more enhancement and customization in your application is allowed by the Style section. In the end, you simply need to insert a navigation bar within the app.vue file. Search for the App.vue file beneath the /frontend/src directory. Change the code with the following instructions:
Save the file, then refresh your local server.
And this is it! Now your single page application (SPA) is working, which was configured and personalized by you.
Combining Vue.js with Python takes a little bit of getting habituated to, because it includes intense exposure to JavaScript, Python, AND SQL at the exact same time
Wish to learn more about Full Stack development services ?
Combining Vue.js with Python provides you with the most seamless and efficient way to manage both the frontend and backend of a modern web page. Python takes care of the server-side logic, but at the same time Vue makes sure the web app interface remains fast, adjustable, and easy to use. If you want to take your project to the next level, make sure you work with a full-stack development agency or hire a dedicated full-stack developer who has all the experience in both technologies. This not only speeds up development but also offers a stronger and more reliable end product.

Related Posts

Top 7 Website Development Companies in Australia
Finding the right website development company in Australia is one of the most important decisions for any business looking to...
Read More
Top 5 Packers and Movers Website Development Companies in Australia
The Australian moving industry has become increasingly competitive, and customers now expect to find reliable removalists online before making a...
Read More
Top 7 Travel Website Development Companies in Australia
Australia’s travel industry is highly competitive, and for most travellers, the journey begins online. Whether you operate a local tour...
Read More